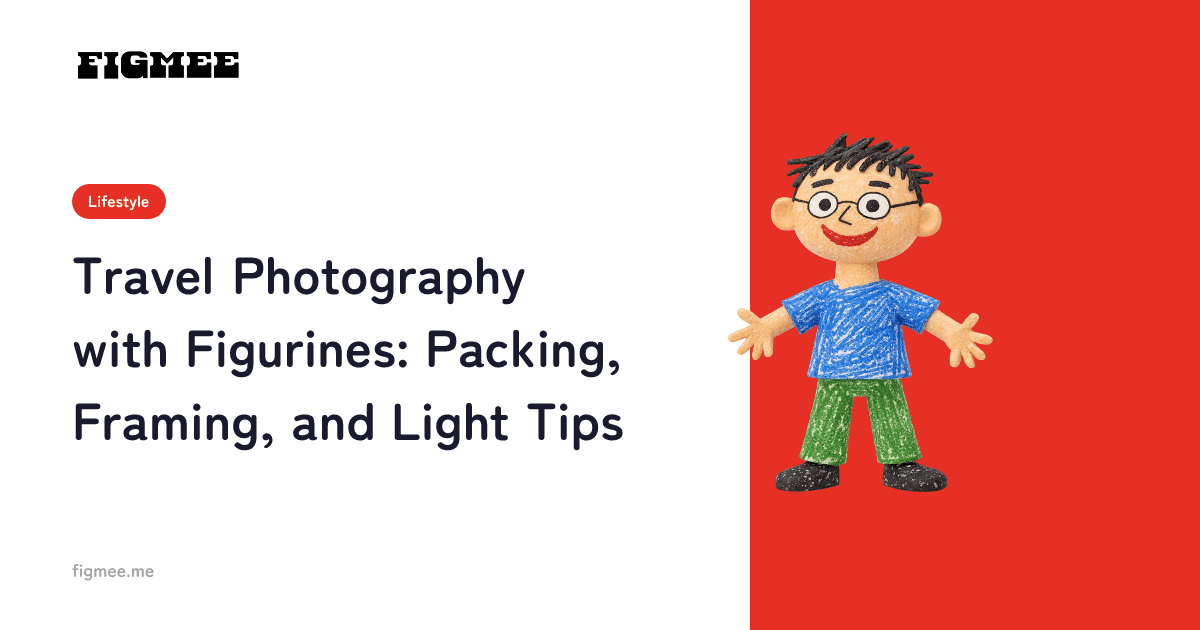
To take great travel photos of your figurines, pack them so they survive the journey, get the camera close to the figure so the background blurs, shoot in the soft light of morning or evening, and work quickly within each location's photo rules. The same basics apply whether you're traveling with a figure or acrylic stand of your favorite character, or with merch of a character you created yourself.
This guide walks through what to pack, how to shoot step by step, framing that shows where you are, and photo etiquette. The second half compares ways to put your own character in your travel photos when you don't have a figure of them yet.
Note: Figmee currently offers figurine-style images created from your drawings, 3D model data (GLB / 3MF), and turntable videos of your 3D models. Ordering physical 3D prints is Coming Soon.
What to Pack Before You Leave
The most common problems on a photo trip are figures getting damaged or lost in transit, and not having the right gear when the perfect scene appears. Packing the following items saves you from scrambling on location.
| Item | What it's for | How to choose / notes |
|---|---|---|
| Padded case or pouch | Prevents damage in transit | Pick a size that doesn't press on thin parts. One that opens easily is best, so you can put the figure back after every shot |
| Small base or stand | Keeps the figure upright on uneven ground | For figures that don't stand well on their own, and for paper stands. Especially handy outdoors in the wind |
| Mini tripod or phone clip | Holds the camera steady at a low angle | Some venues ban tripods and selfie sticks (see below) |
| Lens cloth | Wipes fingerprints and fog off the lens | A smudged lens tends to make the whole photo look hazy |
| Power bank | Keeps your phone alive through long shooting days | On flights, carry it in the cabin rather than in checked bags (see below) |
| Small bag or handkerchief | Something to set the figure on; keeps it clean | Useful on sand or near splashing water |
If you're flying, batteries come with rules. For example, the US Federal Aviation Administration (FAA) states that spare lithium batteries and power banks must travel in carry-on baggage, not in checked bags (source: FAA, "PackSafe - Lithium Batteries"). Check your airline's guidance for capacity and quantity limits as well.
Sunlight is the other thing to watch. Figure maker Good Smile Company explains that sunlight speeds up the evaporation of plasticizers, which causes stickiness, and that UV rays can also fade a figure's colors (source: グッスマらぼ, Good Smile Company's official blog, "ラバー塗装ねんどろいどのお手入れ方法~表面のベタベタ編~" (in Japanese)). Get into the habit of putting the figure back in its case as soon as you're done shooting instead of leaving it in the sun.
How to Photograph Figurines on a Trip, Step by Step
Aim to wrap up each spot in a few minutes, so your travel companions and people around you aren't kept waiting.
- Decide on scenes and times in advance (about 10 minutes before you leave) — From the landmarks, food, and transport at your destination, jot down a few scenes you'd like to shoot with your figure. Outdoors, the first hour after sunrise and the last hour before sunset are known as the "golden hour," when light is soft and warm and considered ideal for photography (source: Adobe, "When is golden hour & how to do golden hour photography").
- Look around and choose a spot (about 1 minute) — Pick a flat place that doesn't block anyone's path, where the figure won't roll away if it falls. Never set it beyond railings or at the edge of water or cliffs.
- Get the camera close to the figure and keep the background far away (about 1 minute) — When the background blurs, even a small figure becomes the star of the shot. The lower your lens's f-number, the shallower the depth of field (the zone that looks sharp) and the blurrier the background, and how close you are to the subject also affects depth of field (source: Nikon School, "Understanding Depth of Field"). Even with a phone, moving in on the figure and keeping the background distant makes the blur easier to see.
- Lower the camera to the figure's eye level (about 30 seconds) — Shooting from above tends to make it look like "a small object on the ground." From eye level, the figure looks like it's standing there taking in the view.
- Take a few shots and zoom in to check them on the spot (about 1 minute) — Check that the face is in focus, the horizon is level, and no strangers' faces slipped into the frame.
- Put the figure back in its case right away (about 30 seconds) — If you leave it standing while you admire the view, wind or passersby can knock it over, or you might forget it altogether.
Framing Tips That Show Where You Are
A good travel photo tells the viewer where your figure is.
- Put the landmark far away and play with scale: Place the figure right in front of the camera and the landmark far behind it, and the small figure appears as big as the landmark. The technique of using distance to make objects look larger, smaller, closer, or farther than they really are is called "forced perspective" (source: Wikipedia, "Forced perspective").
- Add local props: A train ticket, a map, or the wrapper of a regional snack beside the figure keeps the sense of place even when the background is blurred. In restaurants, follow the shop's policy on photos and shoot quickly before the food gets cold.
- Cut reflections at the window: When shooting through a train or plane window, putting the lens close to the glass makes it easier to cut reflections of the cabin lights or yourself.
- Fix backlight with angle and bounce light: A figure with the sun behind it tends to have a dark face. Turn the figure slightly, or bounce light onto its face with a white handkerchief or a sheet of paper.
- Shoot every location with the same framing: Keep the same height and size at each stop, and your photos will read as one series when you line them up at home.
Photo Etiquette and How to Spot No-Photo Zones
On the road, the rules of each place come first. Check the following before you shoot.
- Read the signs and the venue's guidance: Inside museums, galleries, temples, and shrines, photography itself, or the use of flash and tripods, may be prohibited. For example, the Tokyo National Museum allows photography for personal use in its collection exhibitions, but works marked with a no-photography sign can't be photographed, visitors are asked not to use flash, monopods, tripods, or selfie sticks, and special exhibitions are generally no-photography (source: Tokyo National Museum, "お客様へのお願い" (in Japanese)).
- Don't place figures on exhibits or other people's things: Keep figures off cultural properties, exhibits, shop merchandise, and other people's belongings.
- Don't block walkways or linger: Where people are moving through, keep your shooting short. For crowded landmarks, consider going in the quieter morning hours.
- Be considerate of people in the frame: If a photo you plan to post on social media shows other people's faces, blur them or skip that photo.
5 Ways to Put Your Original Character in Travel Photos
You drew a character of your own and want them in your travel photos, but you don't have a figure of them yet. Here are the options, split into ones you shoot on location and ones you finish at home.
| Method | What you need | Result | Effort | Best for |
|---|---|---|---|---|
| 1. Print the figurine-style image and make a paper stand | Printed image, cardboard, stand | Shot in real light on location. It's flat, so shoot from the front | Medium | Shooting on the spot, in the scenery |
| 2. Show it on a phone or tablet held up to the scenery | A device to display it and one to shoot with (or a companion) | The screen appears in the shot. Rotate the 3D model to match the character's angle | Low | Shooting without extra luggage |
| 3. Composite it into your travel photos later | Scenery photos, an app that can cut out and composite | Free choice of position and size, but matching the light direction takes work | Medium–high | Taking your time finishing at home |
| 4. Add the 3D model's turntable video to your travel clips | Turntable video, a video editing app | A short clip that shows the character's full 3D form | Low | Short-form videos looking back on the trip |
| 5. 3D print the 3MF data yourself | A 3D printer or a print service | A 3D object you can shoot on location; results depend on the equipment | High | Shooting in 3D when you have access to printing |
1. Print the figurine-style image and make a paper stand
Figmee's figurine-style images can be saved as PNG files and are generated on a white background. Print one on paper, cut along the outline, back it with cardboard, and slot it into a stand, and your character can pose in front of the scenery on your trip. The white background also makes the cutting line easy to see.
Outdoors, paper stands blow over easily, so use a clip-style stand or pick a sheltered spot. Near water, take care to keep the paper dry. For a comparison of ways to turn your artwork into merch such as acrylic stands, see How to Turn Your Illustrations Into 3D Goods.
2. Show it on a phone or tablet held up to the scenery
The advantage of this method is that it adds nothing to your luggage. If you've made a 3D model of the work, you can rotate it with your finger on the work page, so you can turn your character to suit the scenery. Hold the device up in front of the view and shoot it with a second device, or ask a companion to take the photo.
Turn the screen brightness up and find an angle where the sky and lights don't reflect on the screen, and your character will come out clearly. If you're heading somewhere with weak signal, save screenshots of the angles you want before you go.
3. Composite it into your travel photos later
On location, photograph the spot where you want your character to stand, from the character's eye level. Back home, cut the character out of the saved figurine-style image and layer it onto that photo. In the Photos app on iPhone, you can touch and hold the subject of a photo to isolate it from the background, then copy or share it (source: Apple Support, "Lift a subject from the photo or video background on iPhone").
To make it look natural, match the character's shading to the light direction in the background photo (the direction the shadows fall), and paint in a faint shadow at their feet. Decide the size by comparing with objects of a known size, such as a bench or a handrail.
4. Add the 3D model's turntable video to your travel clips
For works with a 3D model, select "Create 360° video" on the work page to export a video of the rotating 3D model without using any tokens. It's a square video about 6 seconds long, during which the 3D model rotates twice (with the Figmee logo in the bottom right corner). Drop it between short clips from your trip, and your travel record shows your character's full 3D form.
The video format depends on your browser: browsers that can't export MP4 produce WebM instead. Export works in Chrome and Edge on computers and in Chrome on Android, and may not be available in Safari (including on iPhone and iPad) or Firefox. For the export steps, see the Help article Exporting a 360° video of your 3D model.
5. 3D print the 3MF data yourself
If you want to shoot your character in 3D on the road, you can save the 3D model's 3MF data and print it on your own 3D printer or through a print service that accepts 3MF files. Figmee's 3MF files are created at a size where the longest side is 80 mm, and you can change the size in slicer software. Because the data is generated automatically, whether it prints as-is, and how faithfully colors and fine shapes are reproduced, depends on the printer and software. For what 3MF is and how to open it, see What Is a 3MF File?
Ordering physical 3D prints from Figmee is Coming Soon and isn't available yet. When it launches, shipping is planned for addresses in Japan only.
Preparing Your Materials in Figmee
You can prepare the materials for all five methods in Figmee in this order.
- Prepare your character illustration — You can use a drawing on paper photographed or scanned with a smartphone, or a digital illustration. Photos of real people, animals, objects, or scenery, and images that look like photos, can't be used, so you can't upload photos of figures or scenery from your trip as they are. You can upload drawings you made yourself, or images you have permission to use from the rights holder.
- Create a figurine-style image — Upload the illustration and generate. Each generation uses 1–3 tokens depending on the quality (Standard, Pro, Max), and as a sign-up perk, your first 5 generations at Standard quality are free (valid for 3 months from registration, first registration only). You can save the finished image as a PNG.
- Create a 3D model (used in methods 2, 4, and 5) — It costs 5 tokens per model, and your first model is free (one per account). If generation fails, the tokens you used are returned automatically. Because the model is built from a single illustration, the back, which isn't drawn in the picture, is inferred by AI. If you plan to use angles other than the front, rotate the model on the work page and check it before your trip.
- Save everything in the form you'll use — PNG for printing or compositing, the work page for showing on screen, the turntable video for your clips, and 3MF for 3D printing.
For the full process of turning your own character into 3D, and how to approach it without reference sheets, see How to Turn Your Original Character into 3D.
Presenting Your Travel Photos as Work
How you arrange your travel photos can turn them into a showcase for your character.
- Make it a series: Line up the photos you shot with the same framing in the order you visited each place. Put the original illustration first, and viewers can follow the story of your character setting off on a journey.
- Posting after you get home is fine: Posting in real time from the road tells people where you are right now. If that bothers you, post everything together once you're home.
- Let people see the 3D model on the public page: When you publish a work on Figmee, others can rotate the 3D model on its share link page. Add the share link to your travel post, and viewers can see angles your photos didn't capture.
FAQ
Q. How many figures should I bring on a trip? A. If you already know which scenes you want, keep it to a few. The more figures you bring, the longer it takes to unpack them and check each spot, and the easier it is to leave one behind. If you're shooting a series, sticking with the same figure for the whole trip gives the set a unified look.
Q. Can I blur the background with just a smartphone? A. The closer you shoot, the easier it is to blur the background. Get as close to the figure as you can and keep the background far away. If you're so close that the camera can't focus, step back a little and try again.
Q. How can I tell whether photography is allowed somewhere? A. Check the signs on site first, and inside museums, galleries, temples, and shrines, follow the venue's guidance. Even where photography itself is allowed, some venues prohibit flash, tripods, or selfie sticks. When in doubt, asking a staff member is the surest way.
Q. Can Figmee turn photos from my trip into figurine-style images? A. No. Figmee works with drawn illustrations; photos of real people, animals, objects, or scenery, and images that look like photos, can't be turned into 3D images. If an image is identified as a photo, the tokens used are returned automatically. To put your character in your travel photos, use the printing, screen, compositing, or turntable video methods in this guide.
Q. Can I order a physical figure from Figmee? A. Not right now. Ordering physical 3D prints from Figmee is Coming Soon, and when it launches, shipping is planned for Japan only. What you can make today are figurine-style images, 3D model data (GLB / 3MF), and turntable videos. You can use 3MF files with your own 3D printer or with a print service that accepts 3MF.
Summary
The basics of photographing figures on a trip: decide on your gear and the scenes you want before you leave, then on location get the camera close to the figure, shoot from its eye level, and use the soft-light hours. Put the rules of each place and consideration for others first, and return the figure to its case as soon as you're done. Even without a figure of your own character, you can bring them into your travel photos by printing a figurine-style image, showing it on a screen, compositing it into scenery shots, or using a turntable video.